
Add XenorAI to your Custom Website
One script tag. Works with any HTML-based site or modern framework (Next.js, React, Vue, and more).
Before you start
- An active XenorAI account
- Access to your website's source code
- Your website URL and/or documents containing information about your business
Log in to XenorAI
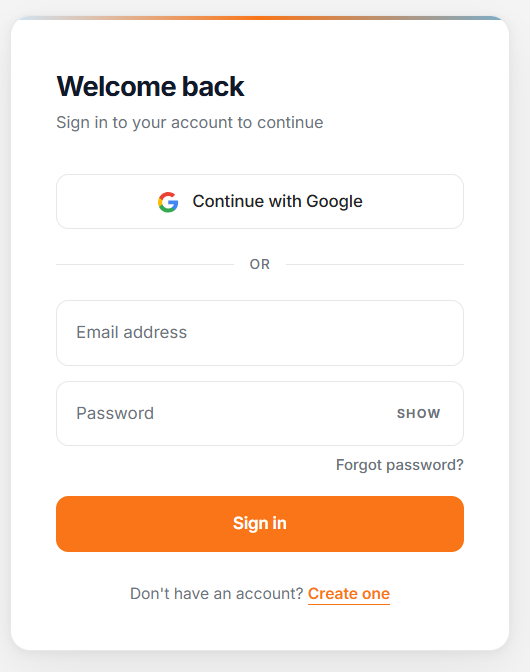
Open xenorai.com and log in to your account. Once you're logged in, you'll land on your XenorAI dashboard.
Create your AI chatbot
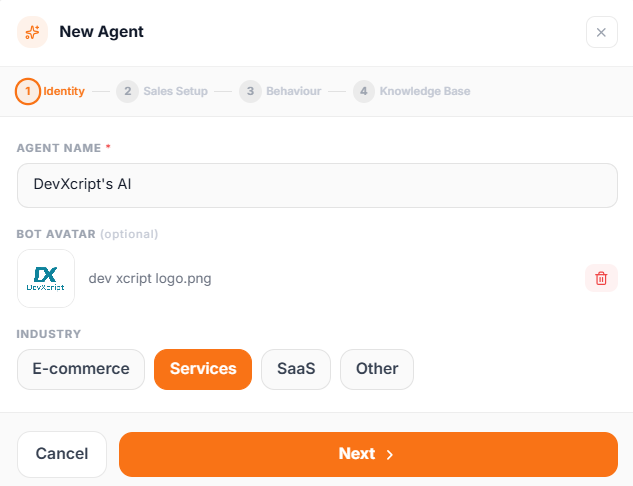
From the Dashboard, click 'Create Agent'. Give your agent a name, upload an avatar, and pick your industry (E commerce, Services, SaaS, or Other).
Set up sales context
Tell your agent who it's selling to your ideal customer, your biggest pain point, and the action you want visitors to take (Book a Call, Buy Product, Get a Quote, or Join Program). Add a booking link if relevant.
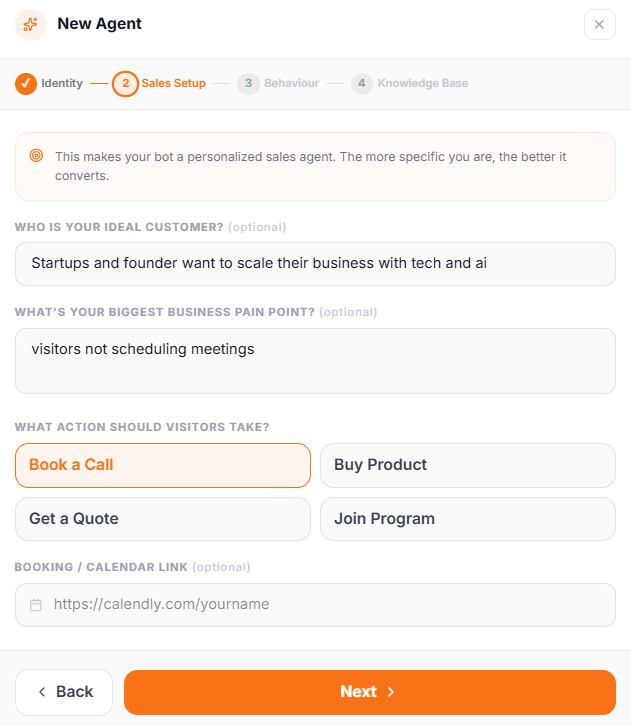
The more specific you are here, the better your chatbot converts.
Set up agent behaviour
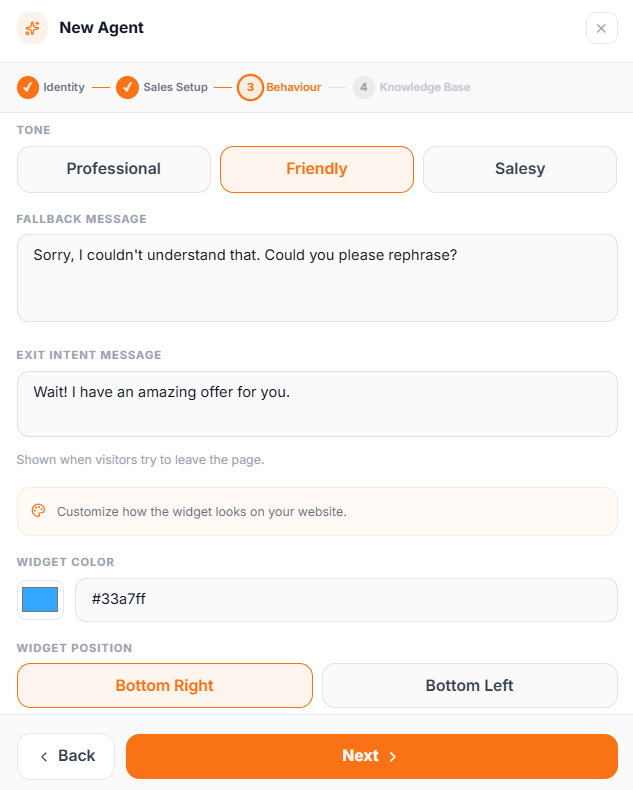
Pick a tone (Professional, Friendly, or Salesy), set fallback and exit intent messages, and customize the widget's color and position on your site.
Add your website domain
Enter your website URL as your knowledge base. XenorAI creates the domain instantly and ingests your site content in the background.
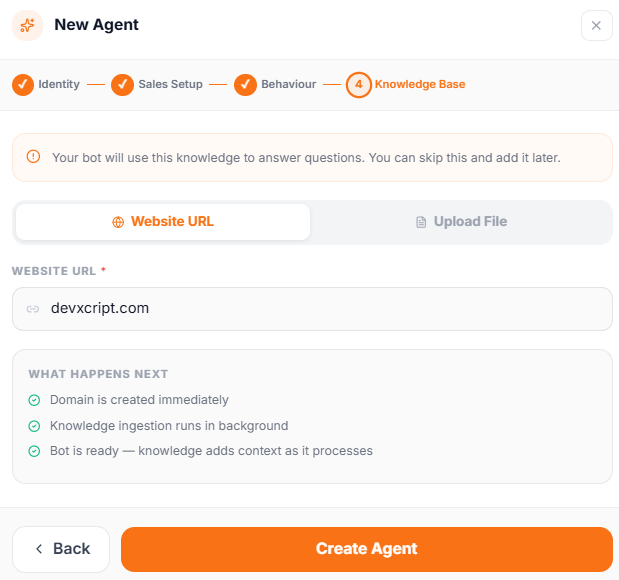
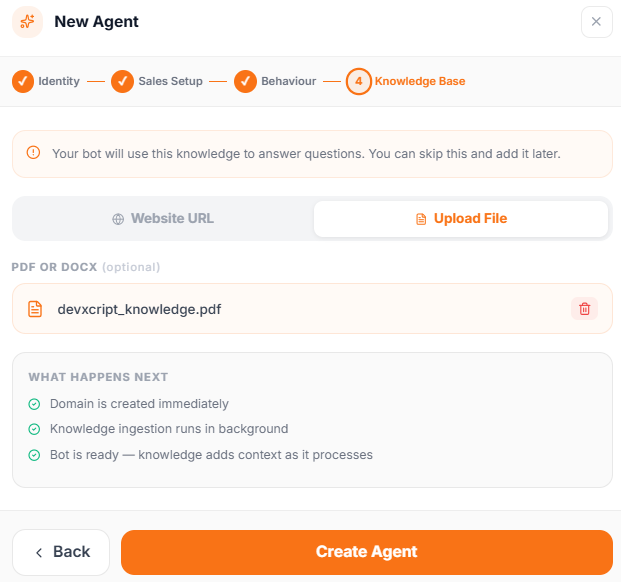
Add your Business information pdf
Or upload a PDF/DOCX with your product, FAQ, or policy info instead of a URL. Click 'Create Agent' when you're ready knowledge ingestion runs in the background.
Copy the installation script
Once your agent is created, find it in your Agents list and click 'Copy Script'. This copies the full <script> tag XenorAI generated for your store.
<script>
  <!-- Your XenorAI installation script -->
</script>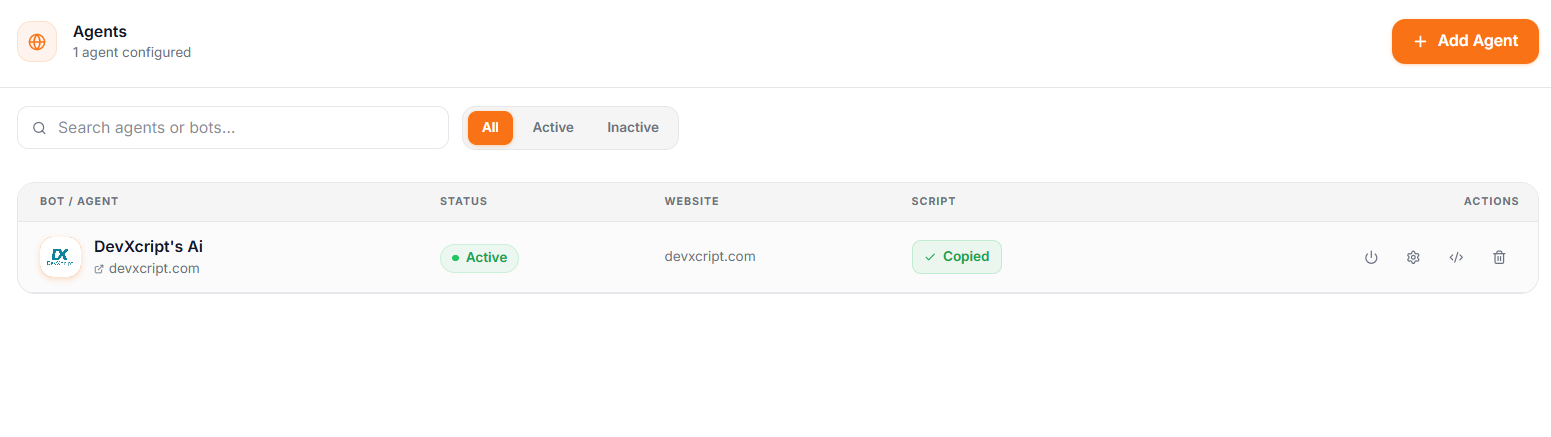
Copy the complete script exactly as provided. Don't modify or remove any part of it.
Plain HTML / PHP sites
Paste the script right before the closing </body> tag, at the very bottom of your page (or your shared footer/template file if your site has one).
  <!-- Your existing page content -->

  <!-- XenorAI Chatbot -->
  <script src="https://api.xenorai.com/widget-loader.js" data-key="YOUR_SCRIPT_KEY"
    data-position="bottom-right" async></script>
</body>
</html>Next.js / React apps
Paste the script inside your root layout file, just before the closing </body> tag, so it loads on every page.
export default function RootLayout({ children }) {
  return (
    <html lang="en">
      <body>
        {children}

        {/* XenorAI Chatbot */}
        <script
          src="https://api.xenorai.com/widget-loader.js"
          data-key="YOUR_SCRIPT_KEY"
          data-position="bottom-right"
          async
        />
      </body>
    </html>
  );
}Other frameworks (Vue, Angular, static site generators)
Same idea everywhere: find your app's root/global HTML template — usually index.html, App.vue, or a main layout component — and paste the script right before the closing </body> tag.
If your framework doesn't allow raw <script> tags in a template, most have a 'custom head/body scripts' setting in their config — paste it there instead.
Save and verify
Save your file and reload your website. Your XenorAI chat bubble should appear in the bottom-right corner. Click it to test — you're all set!